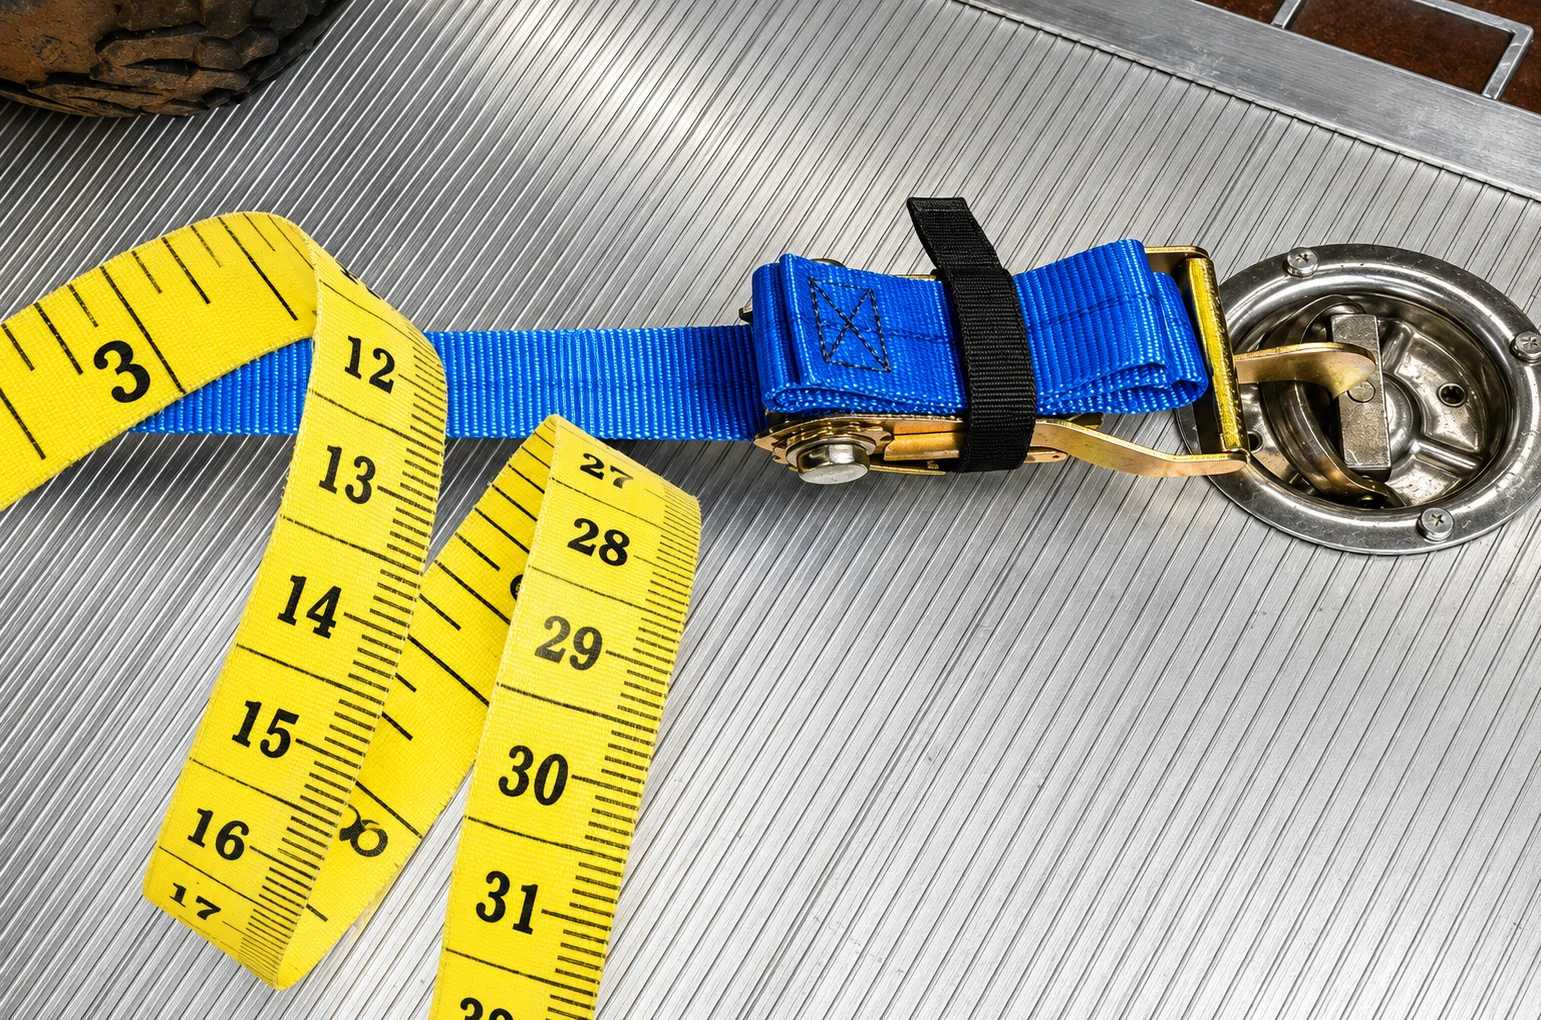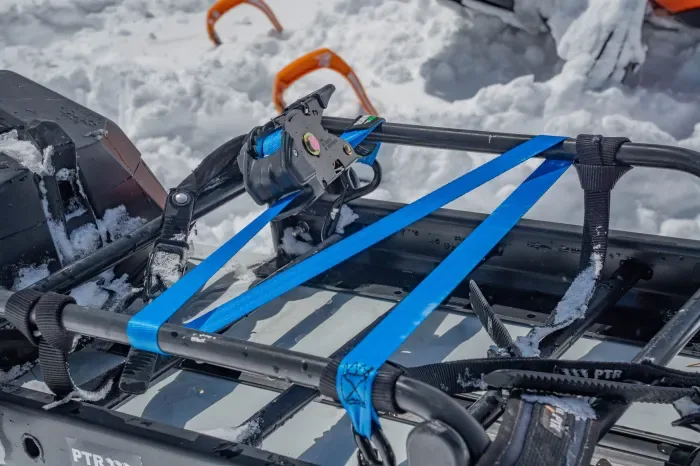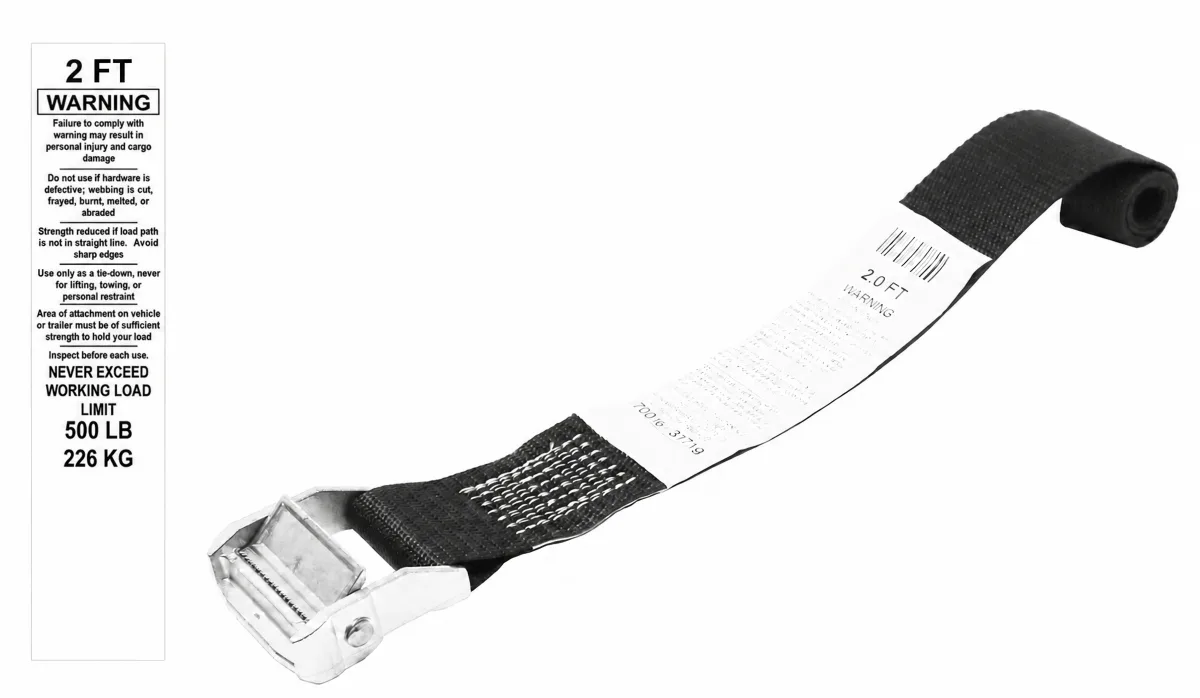
A ratchet strap is easier to use when you understand what each part does. The long webbing end passes through the slotted axle, the handle winds it up to apply tension, and the release lever lets you open the mechanism again.
This guide explains a conventional two-piece ratchet tie-down, from the first inspection to storage after unloading. If you are comparing sizes and fittings, start with our ratchet tie-down straps.
Quick answer: Inspect the strap, position the load, connect compatible end fittings, feed the loose webbing through the axle slot, pull out the slack, ratchet to the required tension, and close the handle fully. To unload, stabilize the cargo before operating the release.
In this guide
- Know the parts of a ratchet strap
- Choose the right strap before you start
- How to use ratchet straps in 7 steps
- How to release a ratchet strap
- Common mistakes and how to avoid them
- Cleaning and storage
- Frequently asked questions
Know the parts of a ratchet strap
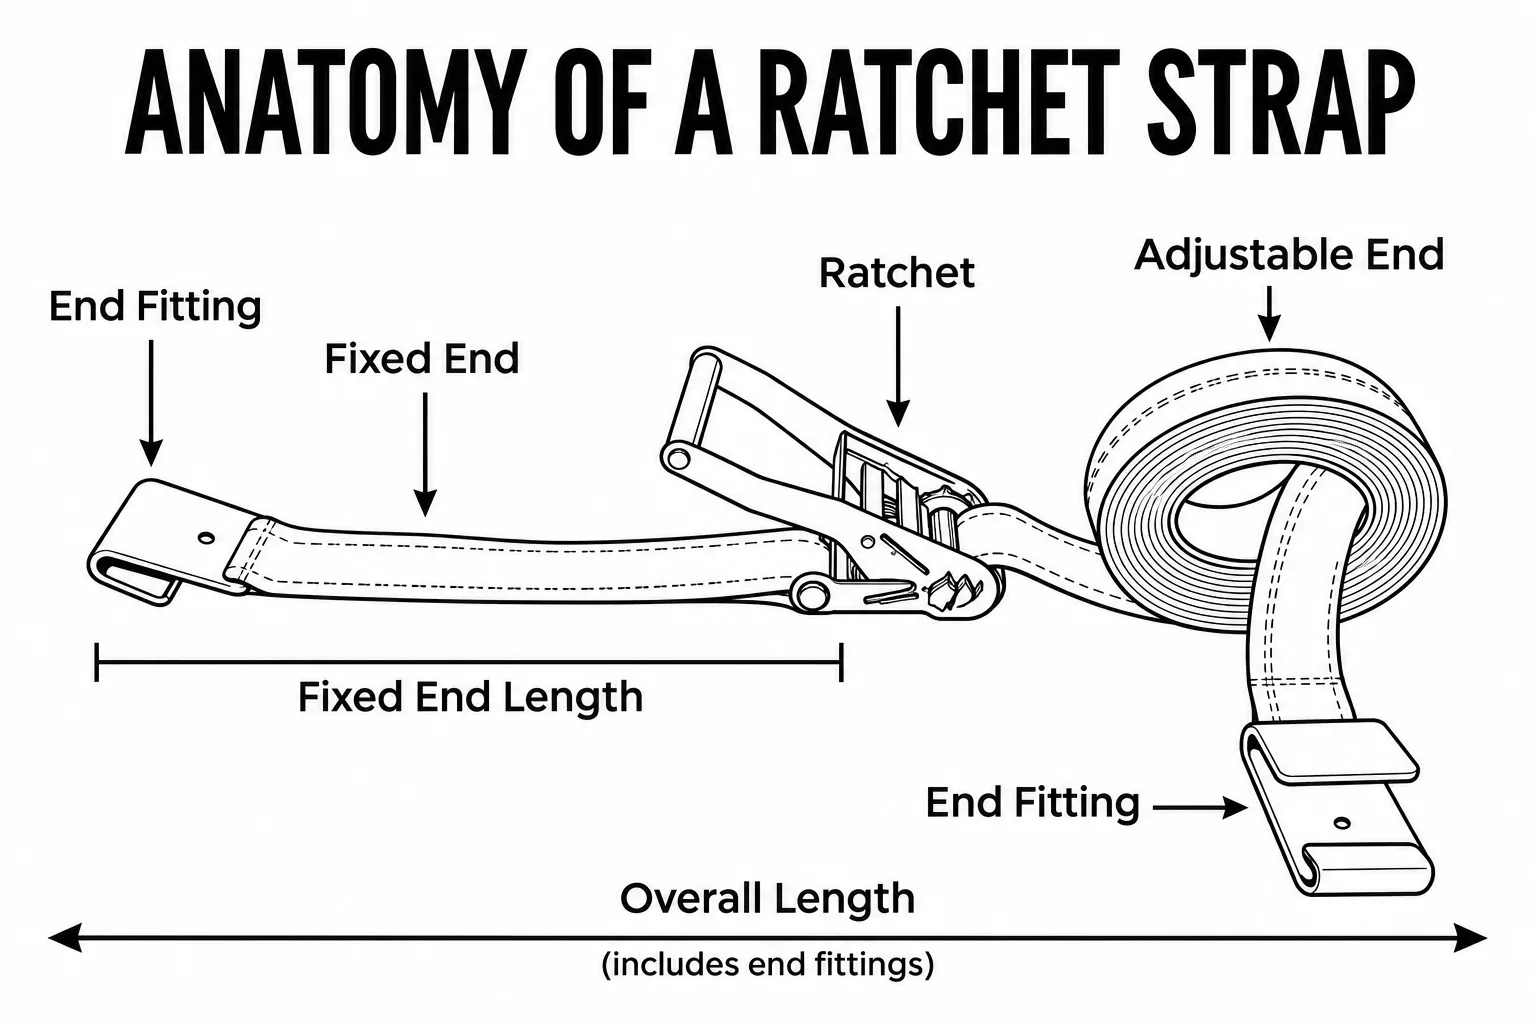
The diagram shows a two-piece ratchet strap with a short fixed end, a longer adjustable end, and a flat hook at each end.
- Fixed end — The short section of webbing that connects one end fitting to the ratchet.
- Ratchet — The mechanism that tightens the strap by winding the adjustable webbing onto its spool.
- Adjustable end — The longer section of webbing that feeds through the ratchet so you can adjust the strap’s working length.
- End fittings — The hardware that connects the strap to compatible anchor points. This assembly uses flat hooks at both ends.
Fixed end length is measured from the outer end of the fixed-side fitting to the ratchet. Overall length is measured with the assembly fully extended and includes both end fittings.
Locate the release lever before connecting the strap. Learning its movement while the assembly is unloaded makes the next steps easier. For other cargo-control formats, explore our product catalog.
Choose the right strap before you start
Match the complete assembly to your cargo, trailer, and attachment points. Width and color alone do not tell you how much a strap can restrain. A longer strap also does not automatically have a higher rating.
Check the stated working load limit, often abbreviated WLL, and the instructions supplied with the assembly. Breaking strength is not the allowable working load. Do not calculate a missing rating from the appearance of the webbing or hardware. If the product carries an LC marking, use the guidance for that rating system rather than treating it as an interchangeable WLL value.
The number and placement of tie-downs depend on the cargo and the securement method. There is no universal strap count for every load. The vehicle, anchor points, and cargo all need to suit the planned arrangement. For US commercial transport, consult the applicable FMCSA cargo securement requirements.
Choose enough usable length to reach the anchors and tension the assembly without crowding the ratchet. Match the fittings to the anchor geometry. Never assume an S-hook, flat hook, or track fitting will work with every attachment point.
If a ratchet mechanism is unsuitable for your application, compare our cam tie-down straps. Cam buckles use a different tensioning method; they still need an appropriate rating and correct installation.
How to use ratchet straps in 7 steps
Step 1: Inspect the complete assembly
Lay the strap out so you can see both sides. Check the webbing and stitching for cuts, tears, heat damage, heavy abrasion, or chemical damage. Inspect the ratchet and fittings for cracks, deformation, serious corrosion, and poor operation.
Remove damaged equipment from service. If you cannot positively identify the assembly's rating or intended use, resolve that before loading it. A knot or a makeshift repair is not a substitute for a serviceable tie-down. The manufacturer's pre-haul inspection guidance offers a useful inspection sequence.
Step 2: Position the cargo and plan the strap route
Park in a suitable loading area and position the cargo on a stable base. Provide the blocking, bracing, or other restraint needed for the load before relying on a strap. Keep the ratchet accessible for both tightening and unloading.
Route the webbing flat across the intended contact surfaces. Add suitable edge protection wherever contact could cut or abrade it. Avoid placing the ratchet directly against a fragile surface or where its handle cannot close.
Step 3: Attach the end fittings
Connect the fixed and adjustable ends to compatible, suitably rated anchor points. Seat each fitting fully and align the webbing with the direction of pull. The drawing shows a strap passing over stacked crates, with the fittings connected at floor level on either side.
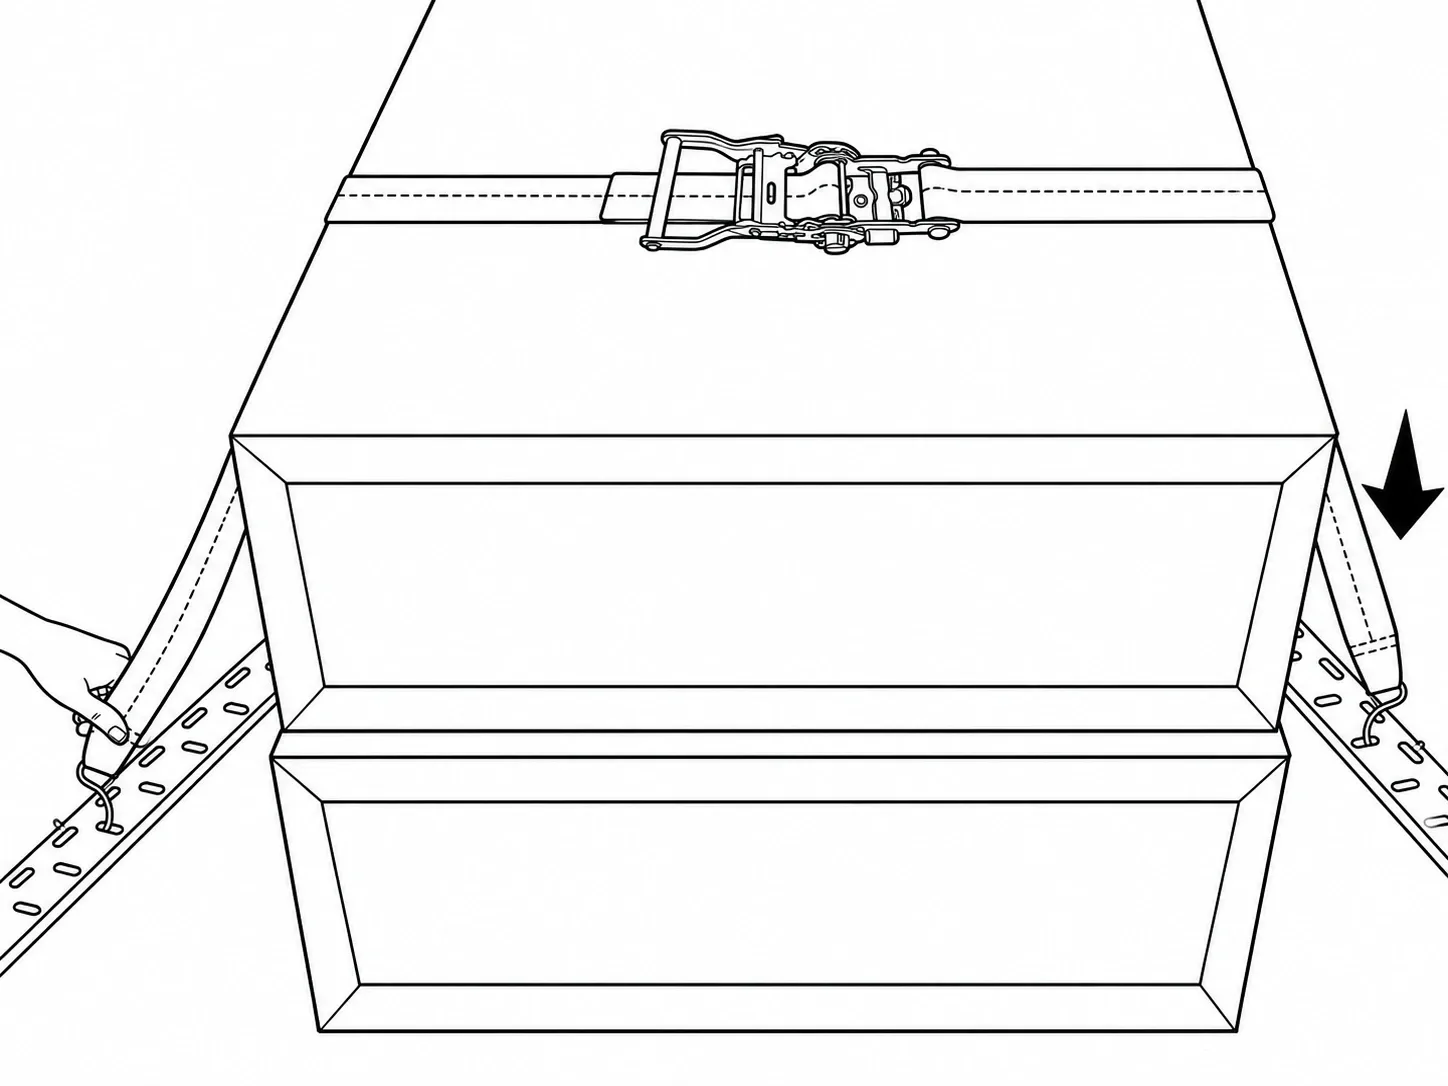
Do not hook onto an unverified body panel, a decorative rail, or an attachment that could deform under tension. A strong strap cannot compensate for a weak connection. If the fitting selection is unclear, contact our team with photos and details of the intended anchors.
Step 4: Open the handle and thread the webbing
Pull the release lever toward the grip and swing the handle open to expose the slot through the mandrel. Check the threading position specified for your model.
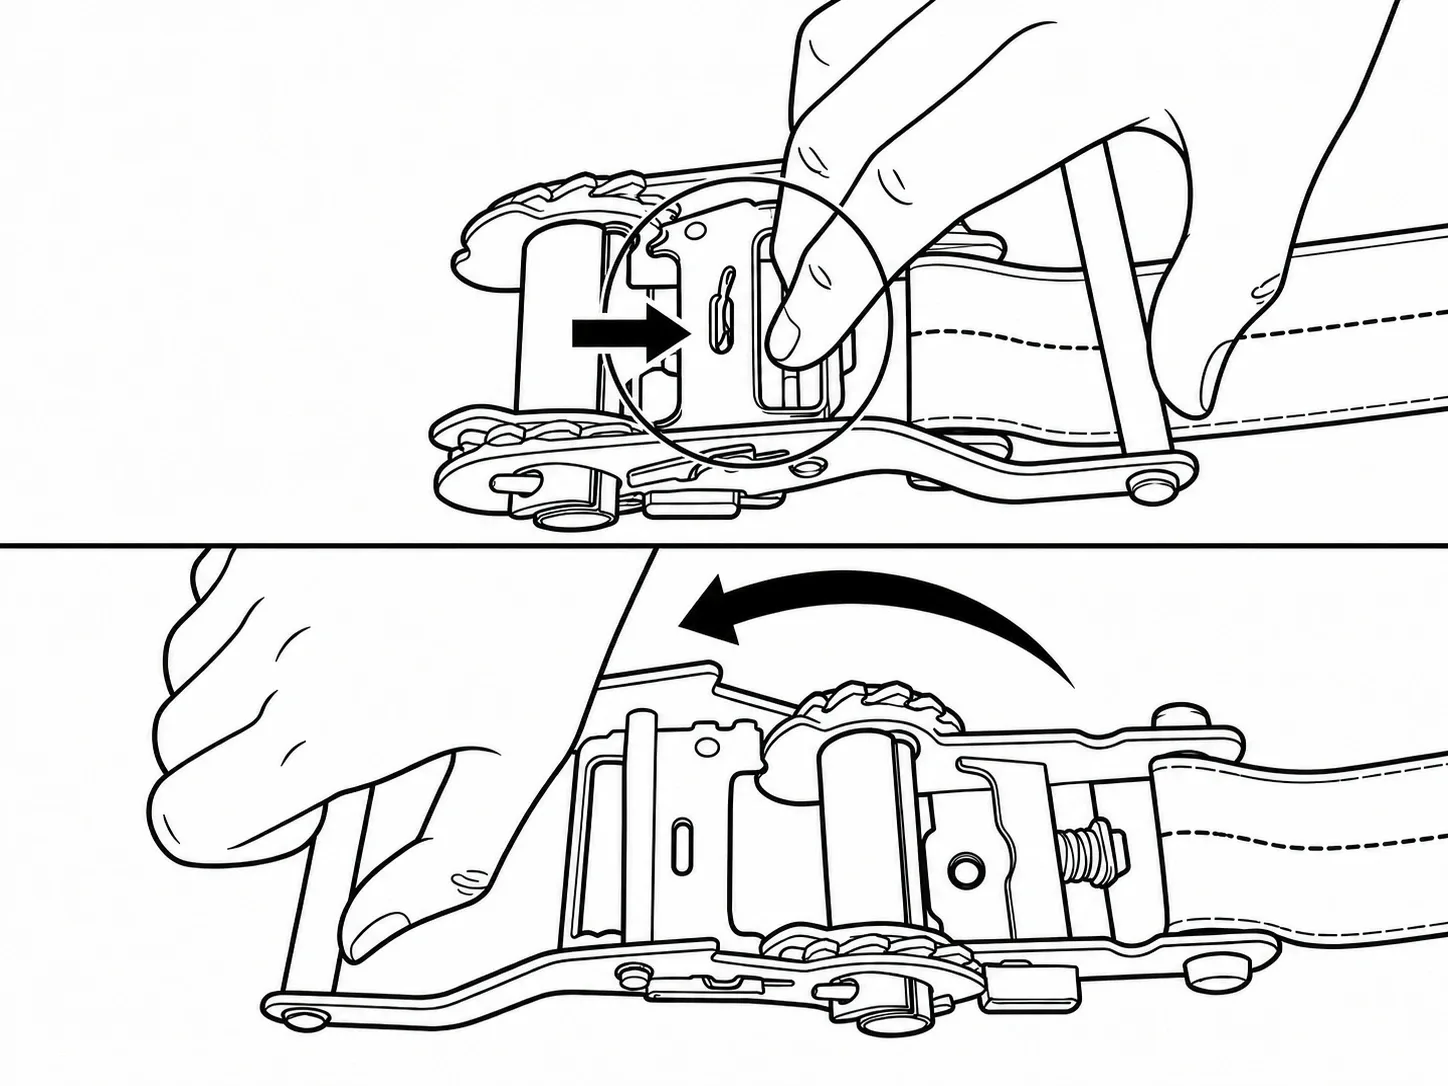
Feed the loose end through the mandrel slot in the direction specified for your model. In the setup shown, the webbing enters from underneath and the tail emerges on the far side of the spool.
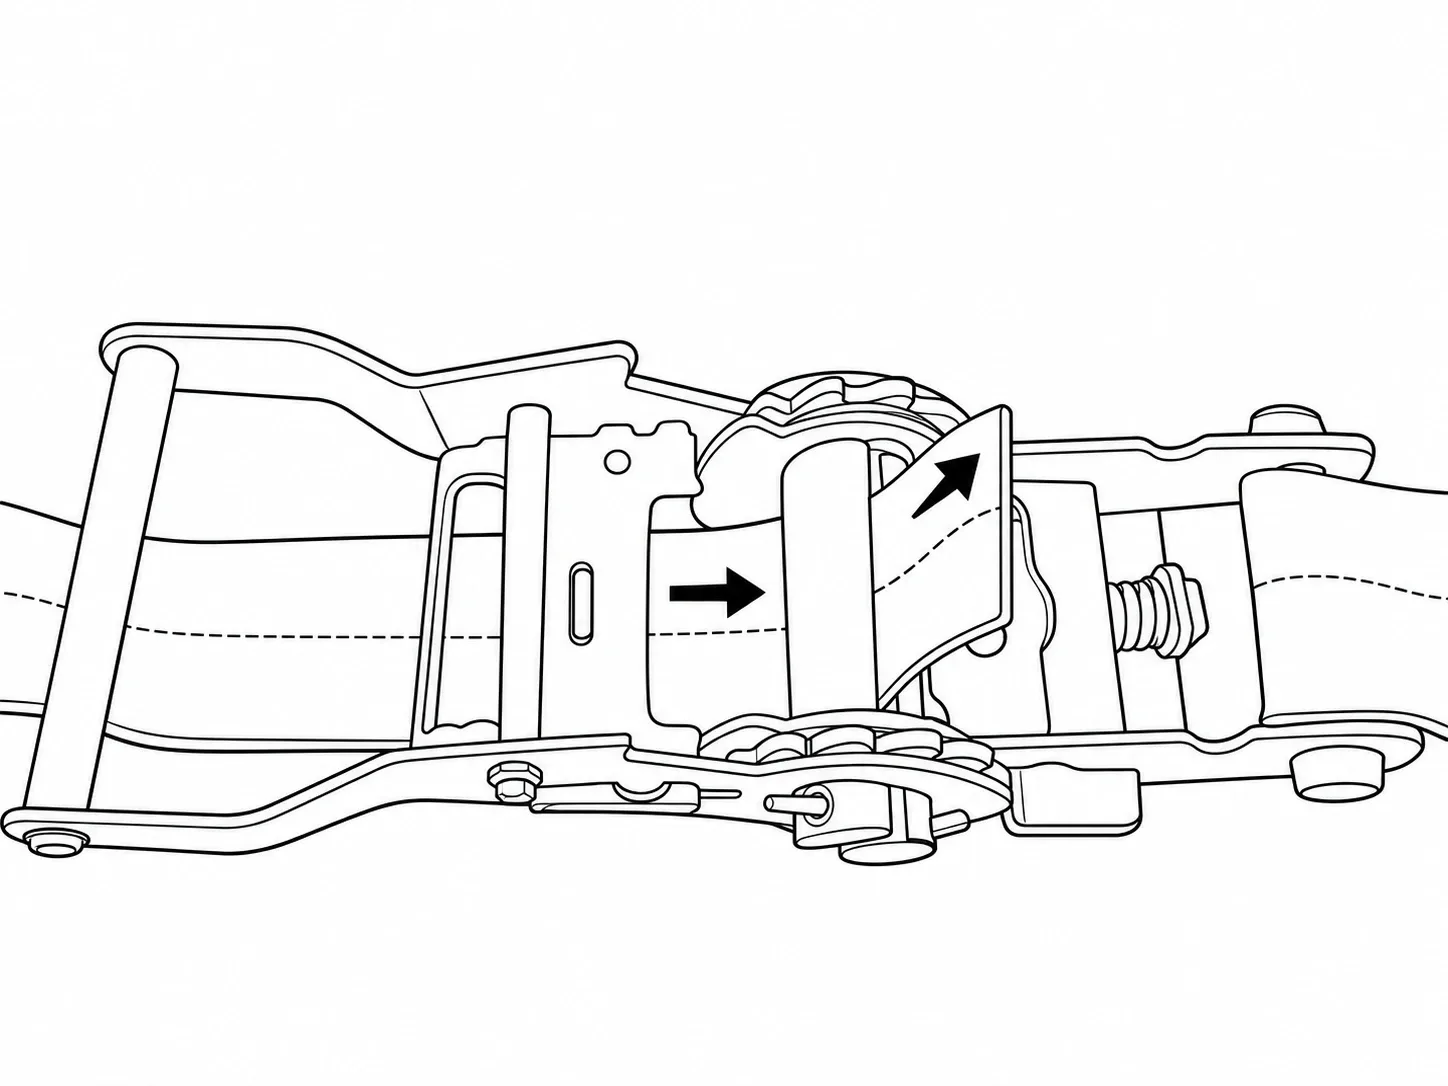
Fold the emerging tail back over the spool so you can pull it by hand. Keep the webbing flat through the slot and along the return path. The US Cargo Control operation guide also shows the general threading sequence.
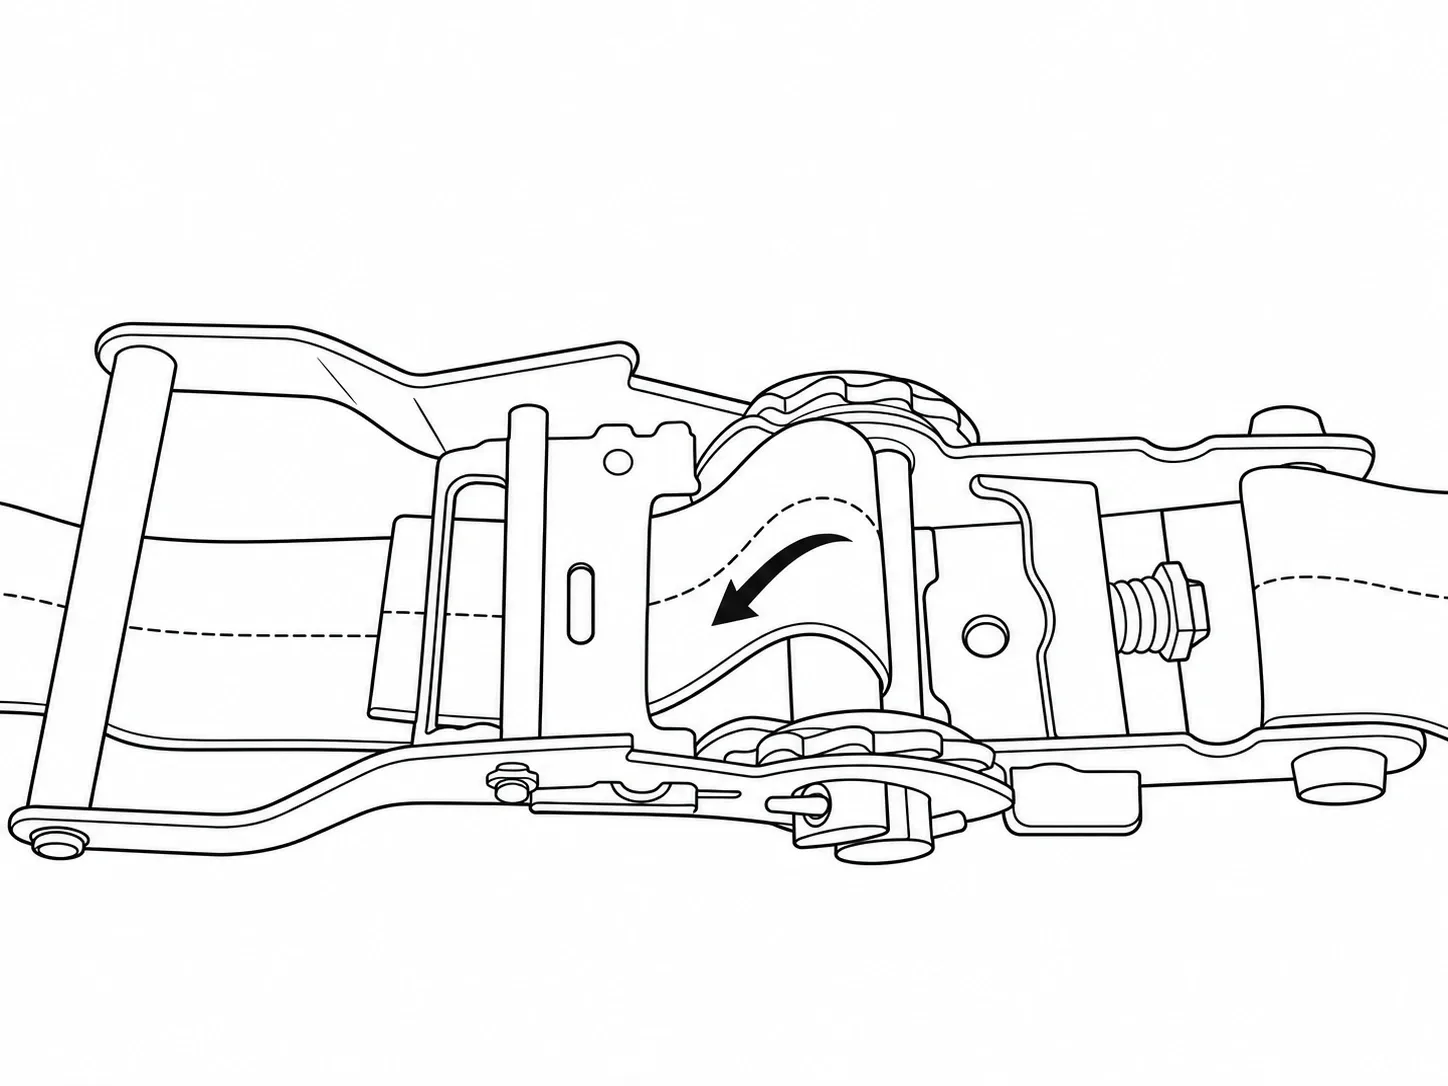
Step 5: Pull out the slack by hand
Pull the loose tail by hand in the direction shown until the strap lies snugly along its planned route. Check the fittings and edge protectors again as the slack disappears.
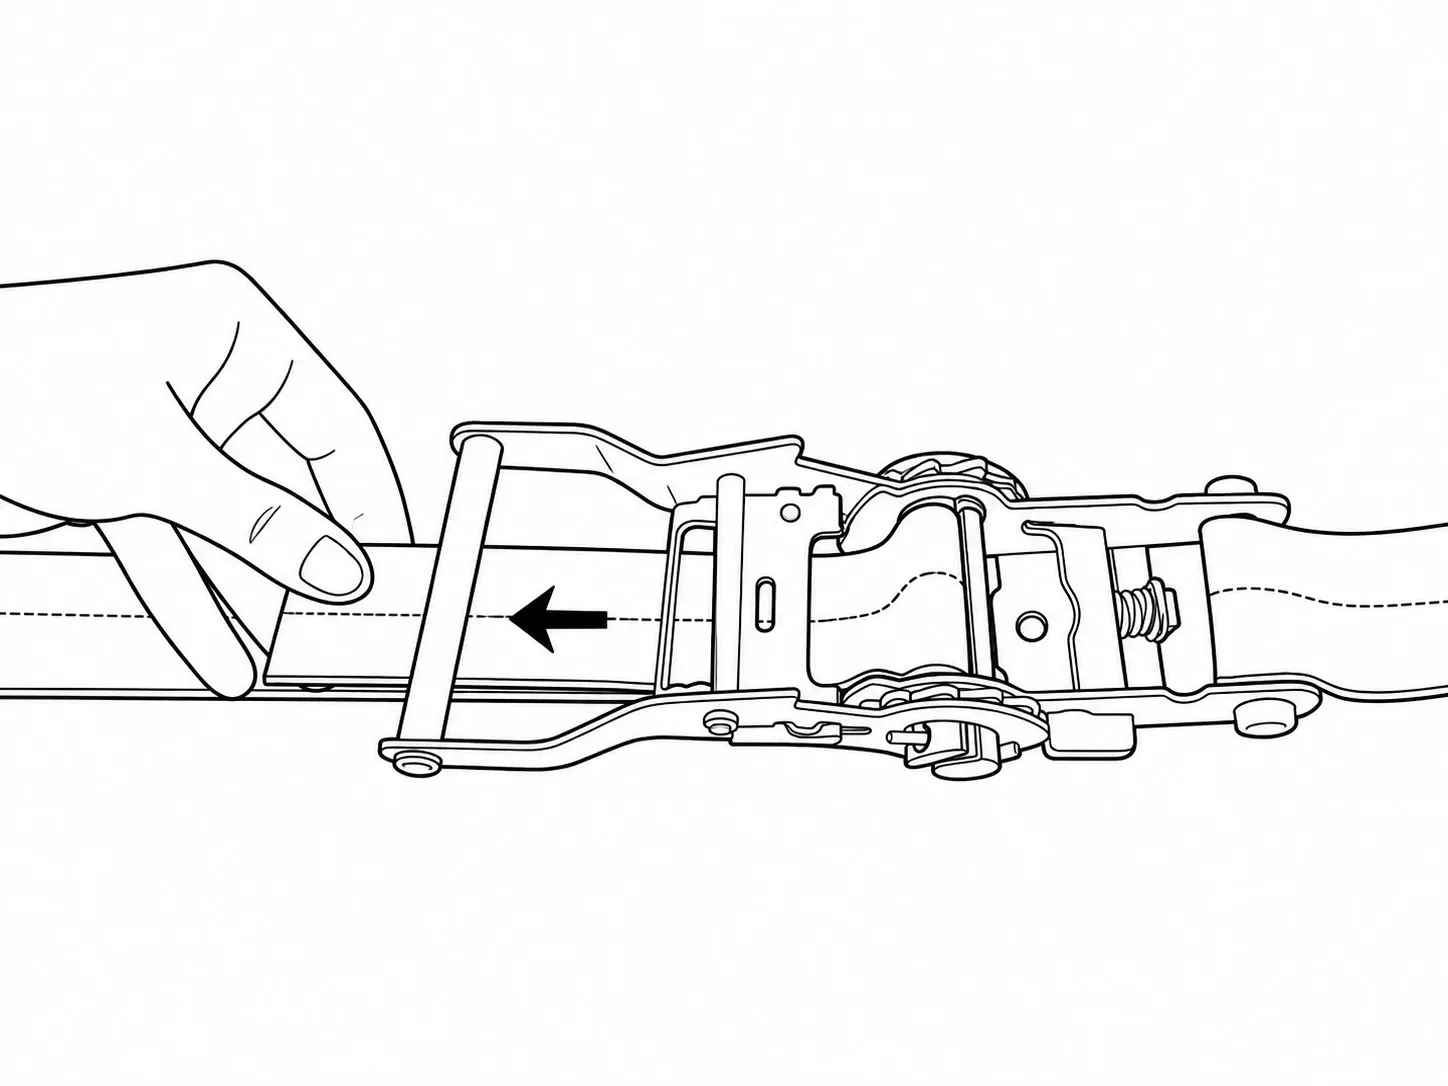
The handle is for applying the final tension. Using it to take up a large amount of loose webbing can fill the spool before the strap is properly tensioned. Leave the allowance needed to achieve the manufacturer's required wraps, without packing the mechanism with excess layers.
Step 6: Ratchet to the required tension
Move the handle back and forth in controlled strokes. Watch the webbing wind evenly onto the mandrel and keep fingers clear of the spool, teeth, and pinch points.
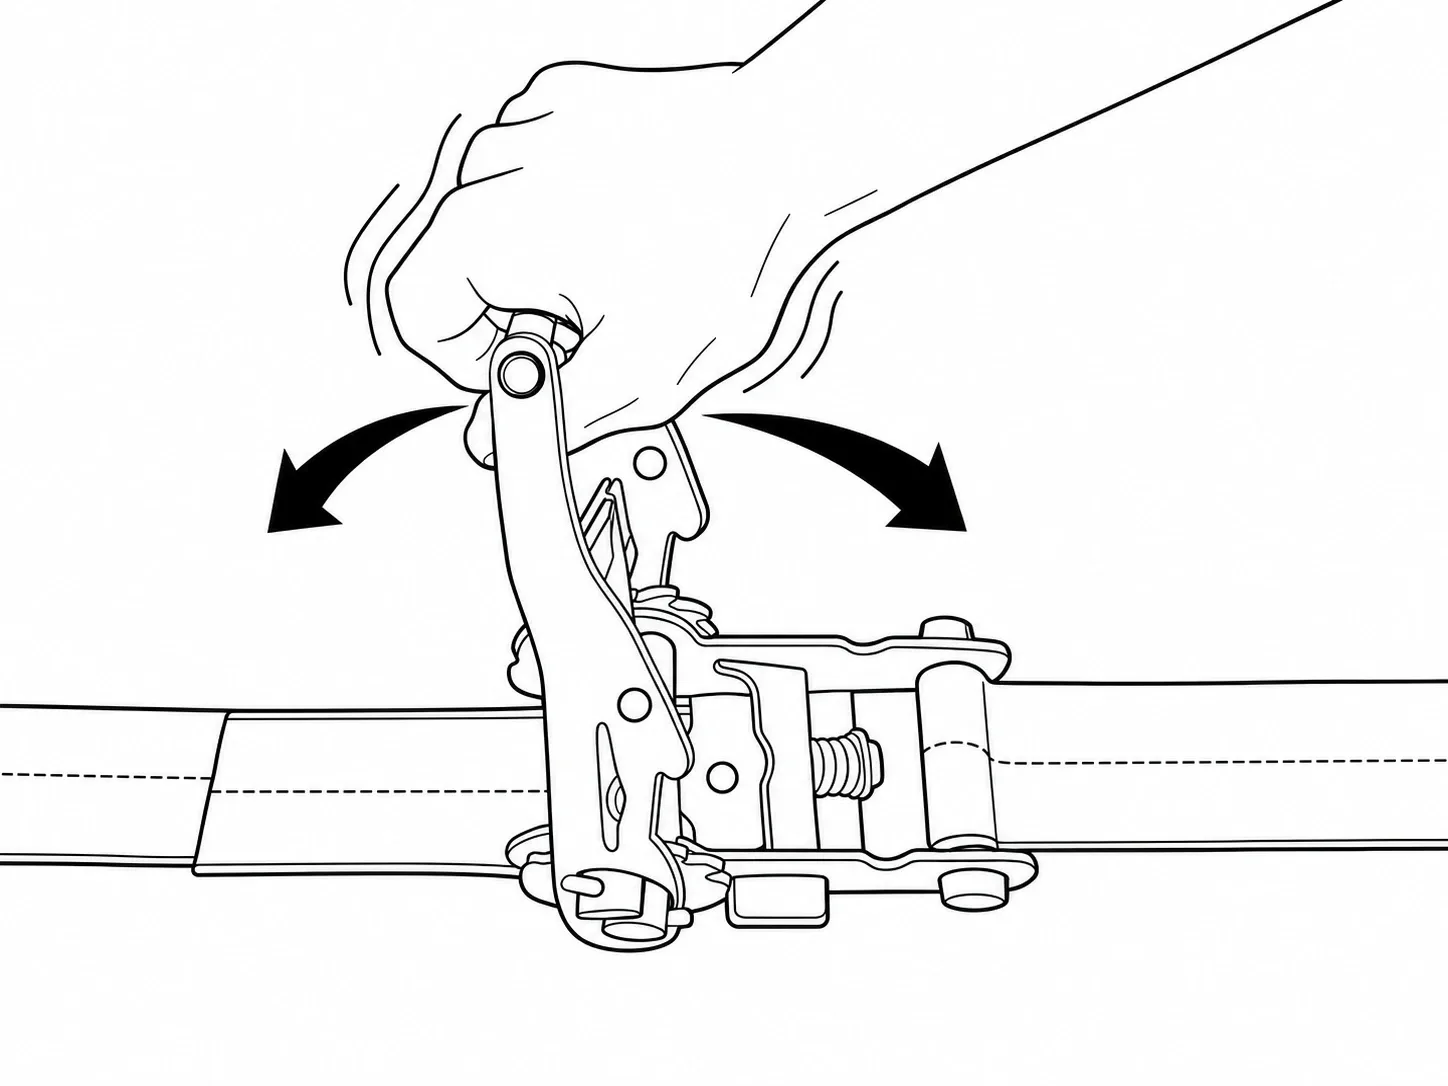
Apply tension according to the assembly instructions and the cargo's requirements. Stop if the load deforms, an anchor moves, or the webbing bunches. A fixed number of handle strokes or a finger-under-the-strap test does not establish the correct tension for every load. Never add a pipe or other handle extension unless the manufacturer expressly permits it.
Step 7: Close, lock, and check
Swing the handle down until it is fully closed and confirm that the lock has engaged.
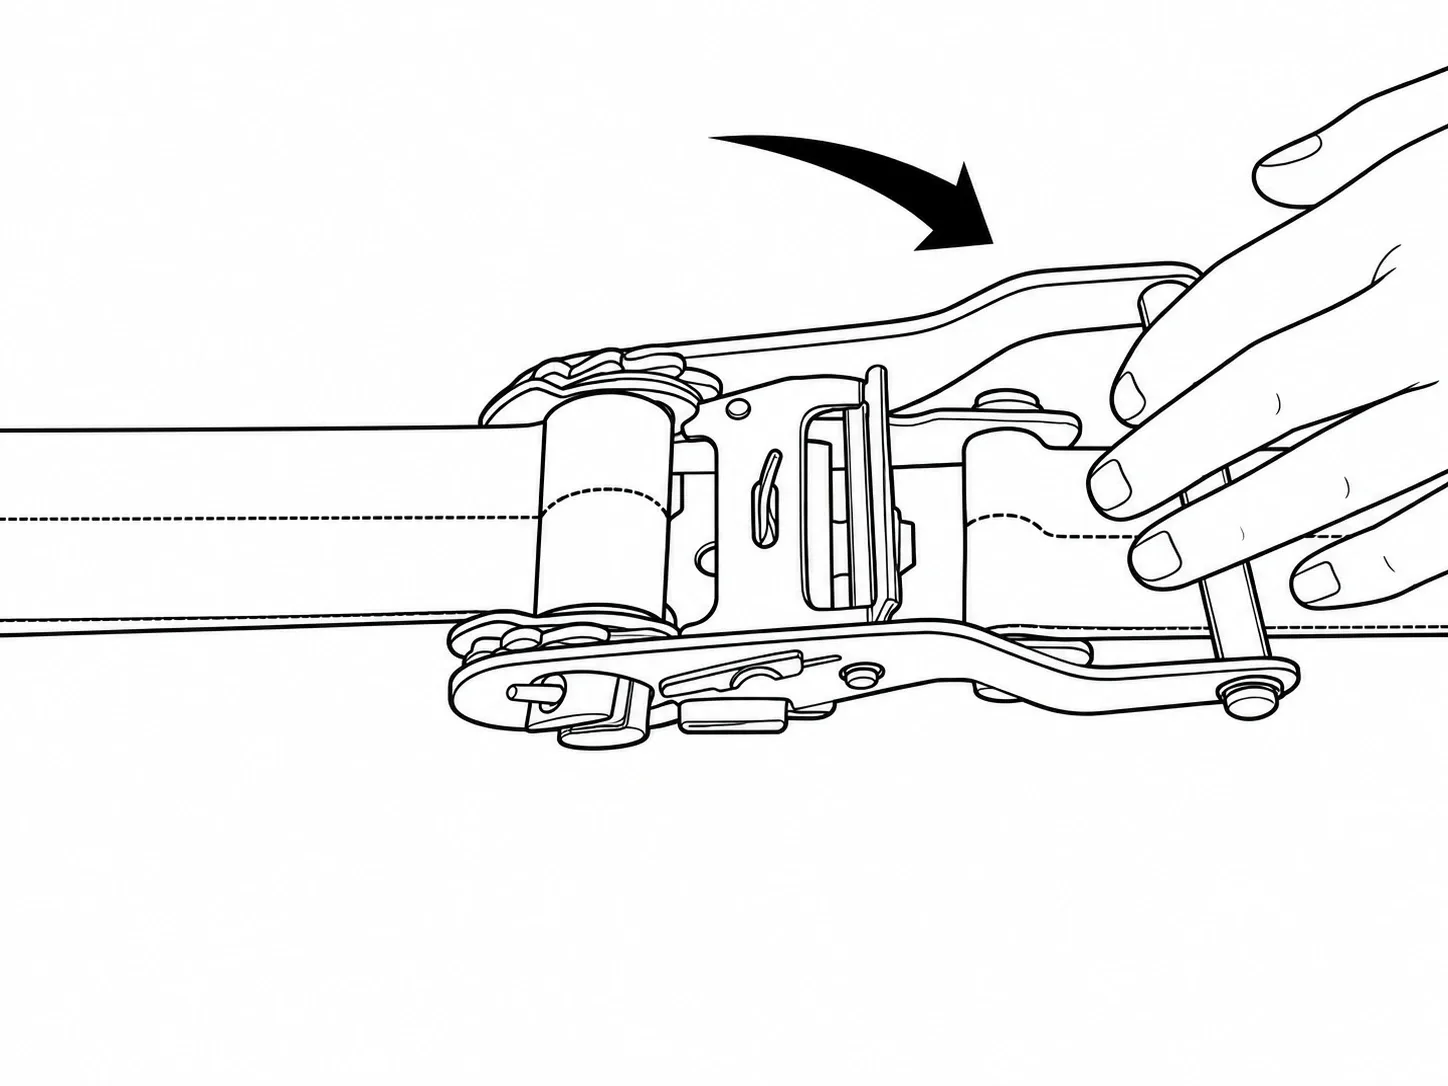
Secure the loose tail with a suitable keeper so it cannot reach wheels, moving parts, or the road.
Walk around the load and check every connection, protector, and strap route. Follow the required in-transit inspection schedule and check again when the cargo settles or conditions change. If anything loosens, stop in a safe place and correct the cause.
For teams standardizing a recurring loading task, our bulk supply service can help organize consistent strap specifications across repeat orders.
How to release a ratchet strap
Release the strap only when the vehicle is stationary and the cargo is stable. Check whether removing tension could allow the load to roll, tip, or shift. Add support or restraint first if needed.
Stand clear of the likely movement of the load, buckle, and fittings. Keep hands away from pinch points. Pull and hold the release lever, then swing the handle to the fully open release position specified for your model. Tension may release suddenly.
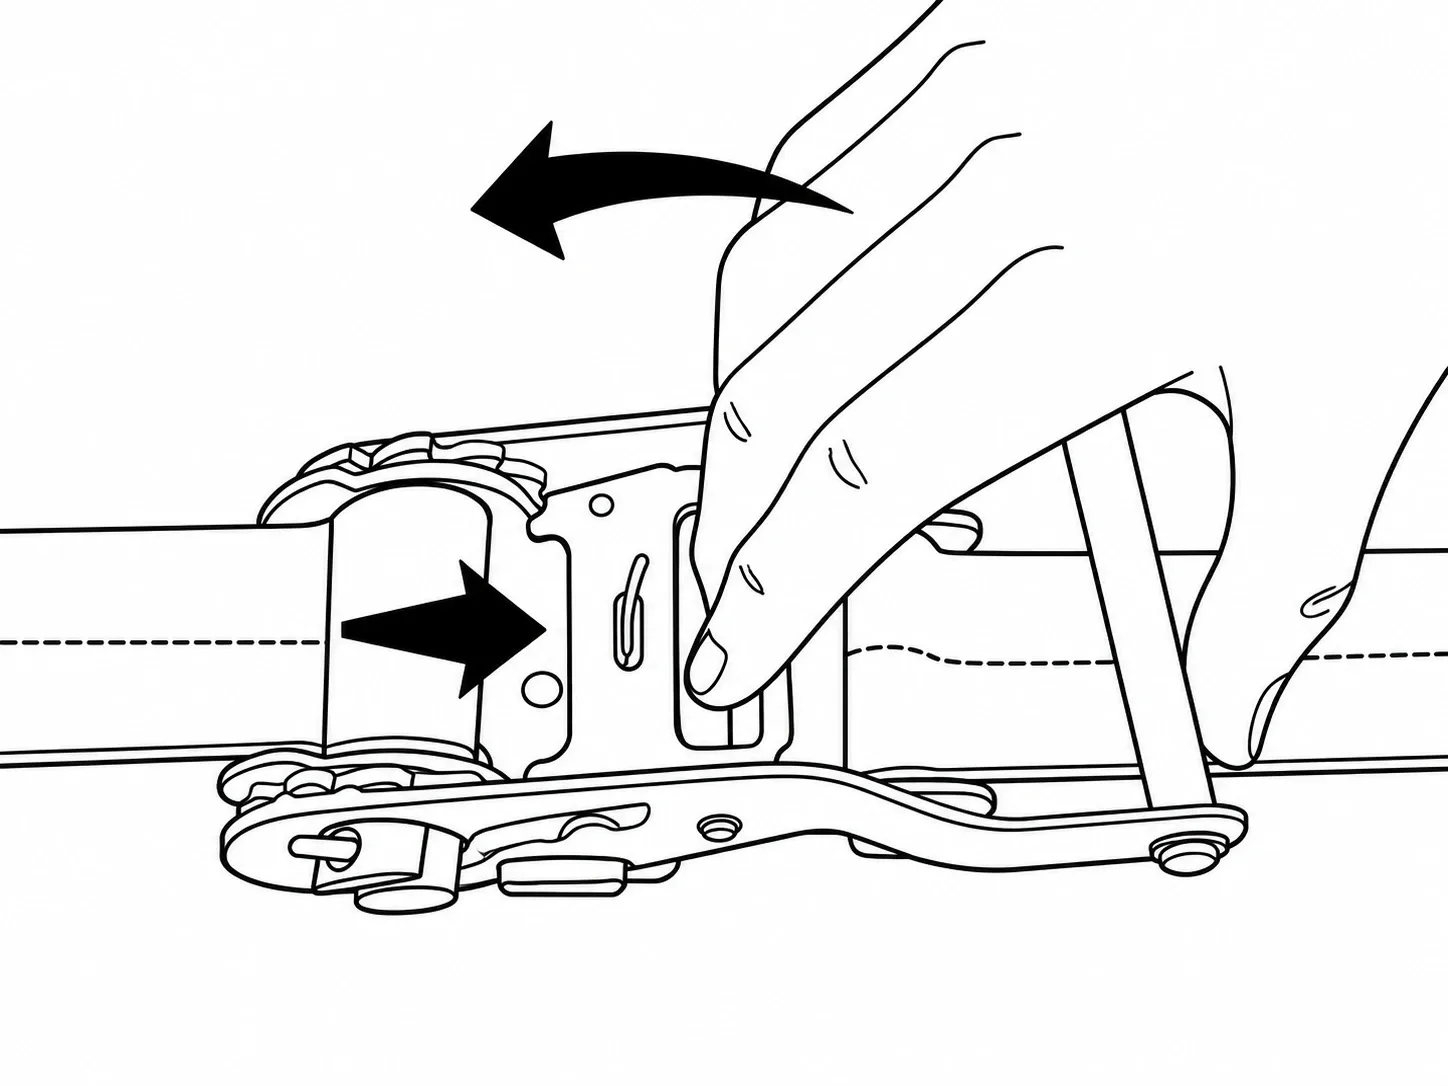
With the handle fully open and the webbing slack, pull the adjustable webbing back out through the mandrel slot by hand.
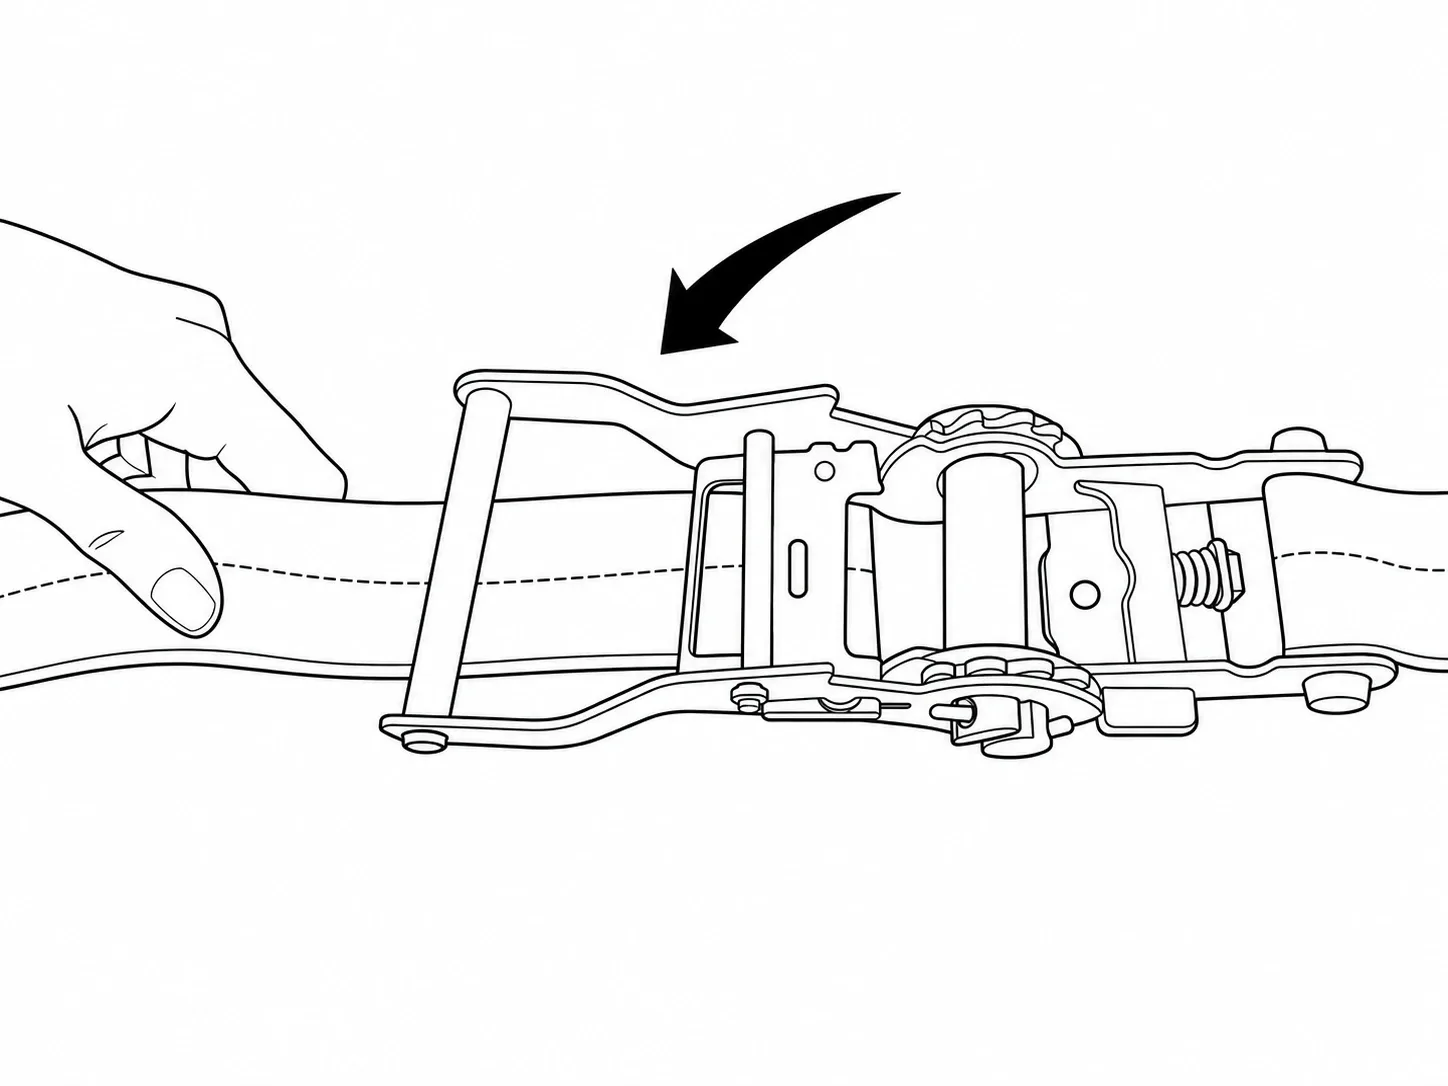
Disconnect the end fittings when it is safe to do so, then inspect and roll the strap.
If the mechanism is jammed, stabilize the load and remove tension safely before investigating. Check for excessive webbing on the spool, folds, or debris. Do not force a loaded ratchet with tools, dismantle it under tension, or cut a tensioned strap to free it. Replace an assembly that remains damaged or unreliable.
Common mistakes and how to avoid them
- Using color as a strength guide: Read the assembly's identification and rating instead.
- Winding all the slack onto the spool: Pull most slack through by hand before tensioning.
- Leaving folds in the mandrel: Unload and rethread the webbing flat.
- Running over an exposed sharp edge: Choose suitable edge protection and check its position.
- Over-tightening delicate cargo: Use a suitable restraint method and the tension specified for the application.
- Leaving the handle partly open: Confirm it is fully locked before transport.
- Letting the tail trail loose: Retain the excess clear of moving parts and the ground.
- Joining straps with knots or improvised hook connections: Select an assembly with the correct usable length and fittings.
Cleaning and storage
Follow the manufacturer's cleaning instructions. Remove dirt without using chemicals or heat that could damage the webbing. Let the assembly dry before storing it.
Roll the long end neatly and retain it with a strap keeper. Store the webbing and hardware away from sharp objects, chemicals, moisture, and prolonged direct sunlight. Keep damaged straps separate from usable stock so they cannot accidentally return to service.
Build this check into unloading rather than waiting until the next job. A neatly stored strap is easier to inspect and quicker to prepare for use.
Frequently asked questions
Why does my ratchet turn without tightening the strap?
Check that the webbing passes through the mandrel slot, the release is disengaged, and the webbing has the wraps required by the manufacturer. Inspect the mechanism while it is unloaded. Do not use a ratchet that slips or fails to hold.
How many times should the webbing wrap around the axle?
Use the minimum and maximum specified for your ratchet. Too few wraps may allow slipping; too many may jam the mechanism or prevent the handle from closing. If the instructions are missing, obtain them before using the assembly.
How tight should a ratchet strap be?
It must provide the tension required by the securement plan without damaging the cargo or equipment. There is no universal tension setting for every cargo and strap combination. Follow the product and load instructions rather than judging by handle effort alone.
Can I use a cargo ratchet strap for lifting or towing?
Use cargo tie-down straps only for their stated purpose. Select equipment specifically designed and rated for lifting, vehicle recovery, or supporting people. Our help center provides a starting point for product and application questions.
When should I replace a ratchet strap?
Inspect it before each use and retire it when damage, wear, or malfunction makes it unserviceable under the manufacturer's criteria. Age alone does not establish whether a strap is safe; condition and service history matter.
Can I order straps with a different length or end fitting?
For a recurring application, specify the required usable length, assembly rating, anchor interface, environment, and identification requirements. Explore our OEM and ODM services, or send an inquiry with your application details. Confirm the proposed assembly before ordering.
Find the right ratchet strap for your application
Good setup starts with a strap that fits the task. Browse Xiangle ratchet tie-down straps to compare available assemblies. For help selecting a specification, share your cargo dimensions, load details, trailer type, and anchor arrangement through our contact page.